7+ simple Blinking LED Circuit Diagram
In this world of Electronics, a simple blinking LED circuit is a very basic yet very useful circuit. Blinking LEDs are often used in a wide range of Electronics projects from simple toys to gadgets, generally their blinking and flashing are programmed on a micro-controller or some kind of timer IC’s.
The LED flasher can be used to create a visual state indication, provide a warning signal or simply to add some stylishness to a project. The best thing is that creating a simple blinking LED circuit is relatively easy, even for those who are new to electronics and DIY.
In this article we will be discussing the basics of LED flasher circuit diagrams, including all the required components, the circuit schematic and programming if any. We will also provide step by step instruction on how to create your own Blinking LED circuit along with a few useful tips and tricks to help you get the most out of your project. Whether you are an occasional electronics enthusiast or just starting in this field, this article will provide you all the information you need to create your own LED flasher circuit and take your projects to the next level.
Blinking LED circuit with 555 Timer and only 5 components

Components required:
Resistors 2x 330Ω, 1x 47kΩ; Capacitor 1x 4.7uF; IC 555; Connecting wires; 2x LEDs; 9V battery;

Circuit diagram:
The above image shows two red and blue indicators in and as a 555 timer blinking led circuit. This is a very simple blinking LED circuit consisting of only 5 components (except LEDs and battery). Strobe effect can be replicated with this circuit as it alternates red/blue color kinda cool though.
Its simplified connection is shown in the circuit diagram in two illustrations. You can solder it on a small compact PCB and make it portable/ versatile. Always check the polarity of the light emitting diode if anode and cathode are connected properly (incorrect polarity of LEDs is one of the most common errors).
Check Arduino sensors in detail and list
LED Blinking schematic using IC 555
Components required:
Resistors 1x 330Ω, 1x 470kΩ, 1x 1kΩ; Capacitor 1x 1uF; Connecting wires; 2x LEDs; IC 555; 9V battery:
Alternative resistor could be 1x 10kΩ; 1x 100kΩ
Circuit diagram:

The above circuit design implemented the design of the blinking LED with the help of timer IC 555. Out of three operation modes viz, astable mode, monostable mode, bistable mode. Here we have used the 555 timer IC in an Astable configuration.
Astable mode of operation gives two digital levels at the output, that is the output voltage will swing from high and low and low to high at regular intervals determined by RC network. This character of the astable output is used as a clock or square wave generator in various electrical circuits.
The Blinking LED circuit uses a pin number ‘3’ of 555 timer IC in astable mode, and will turn LED ON and OFF.
The duration of ON/ OFF is the duty cycle of the output square wave generated which can be changed by changing the value of the tank circuit. Also IC555 works with a wide range of voltage supply from 5V to 18V up to 200mA of load current.
If you ever need to convert 3.7V from 18650 battery to 5V DC then –> Try these 3.7V to 5V dc dc circuits
Note:
All the All the circuit below uses a general purpose transistor so you can use any general purpose transistor available in your electronics project kits, you can use general transistors like BC 547 or 2N3904, BC 557, 2N2222, 2N2907 BC548,BC547. Please note that you can not substitute an NPN transistor with a PNP.
Simple One Transistor 2N3904/ BC547 LED flasher circuit
Components required:
Resistors 1x 100Ω; 1x 1kΩ; Capacitor 1x 100uF; Transistor 2N3904; Connecting wires; 1x LEDs; 9V battery;
Circuit diagram:

This circuit only uses the transistor’s Collector-Emitter terminal, keeping the Base terminal open. That circuit looks to be technically incorrect, however the above circuit diagram shows that even with just one transistor as the main component, you can create a working single LED flasher circuit. The circuit utilizes the negative resistance area in transistors to produce the blinking effect.
It is possible to change the flashing rate by changing either R11 or C4 or both together, but supply voltage must not be less than 9V otherwise the circuit does not work.
Even when the resistor R10 is short circuit it will work fine. The transistor in the 12V BC547 LED flasher circuit can be replaced with any general purpose NPN transistor.
Low Voltage Simple 1.5V/ 3V Single LED Flasher circuit
Components required:
Resistors 1x 100Ω; 1x 1kΩ; 1x 1MΩ; Capacitor 1x 100uF(or any), 1x 470uF; Transistor 1x BC547(npn), BC557(pnp); Connecting wires; 1x LEDs; 1.5V battery;

Circuit diagram:

This circuit is very efficient and works only on as low as 1.5volts of supply, as this consumes current in the range of mAmps it lasts for very long without need to change the battery. You can power this circuit even with 3 volts and it would work fine.
3.7V/ 5V Blinking LED circuit using transistor
This is the tested and 100% working circuit of 3v LED flasher circuit, it utilizes a cross coupled transistor switching circuit as an astable multi-vibrator, but with lesser components than that of above which works on lower voltages like 3 volts and 5 volts.
Components required:
Resistors 2x 100kΩ; Capacitor 2x 100uF; Transistor 2x 2N3904; Connecting wires; 2x LEDs; 1.5V battery/ 3V battery/ 3.7V battery;
Circuit diagram:

The circuit shown above is the same as an Astable multivibrator design which is previously discussed above, using two transistors but with lesser components.
List of all Arduino projects for beginner Ideas
Blinking LED circuit using transistor in Astable Multivibrator mode
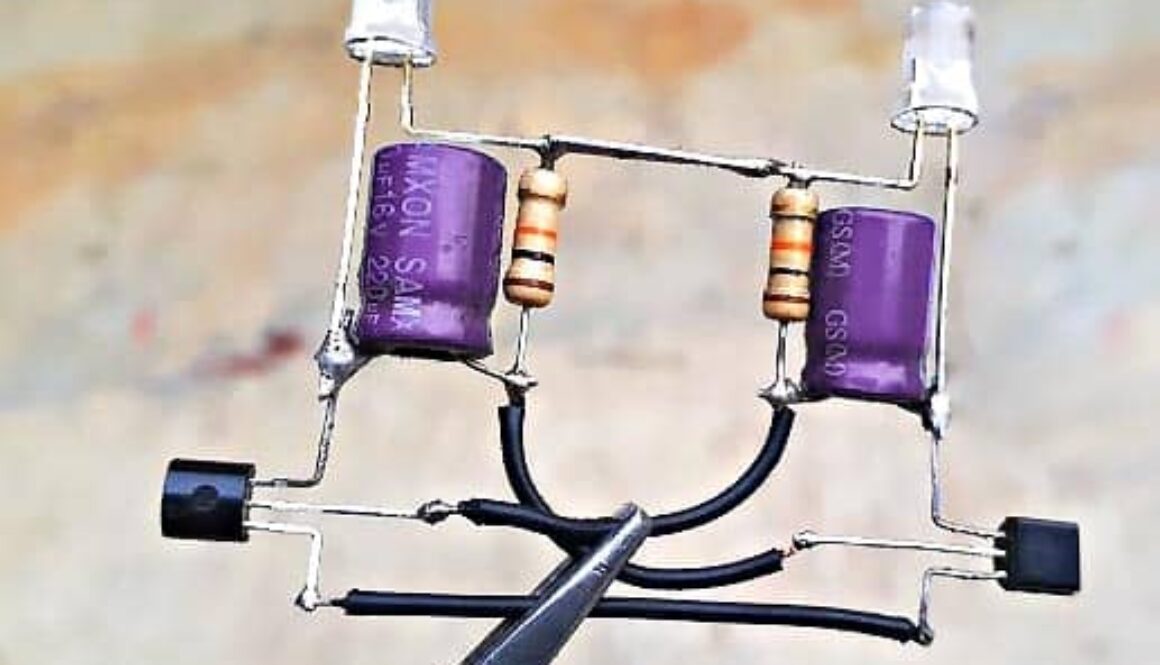
This circuit is made possible using the regenerative switching circuit. The circuit shown below is called an Astable Multivibrator design using two transistors. Astable Multi-vibrator are the most commonly used type of relaxation oscillator due to not only they are simple, reliable but also very simple to build. Also produces a constant square wave output signal which is used here in a bc547 led flasher circuit.
The video below is for reference only, flasher circuit is modified for only two resistors, it is recommended to connect all the required components if you are using this for high school projects.
Components required:
Resistors 2x 47kΩ, 2x 470Ω; Capacitor 2x 10uF; Transistor 2x 2N3904 (or BC547); Connecting wires; 2x LEDs; 9V battery.;
Circuit diagram:
Blinking LED circuit explanation:
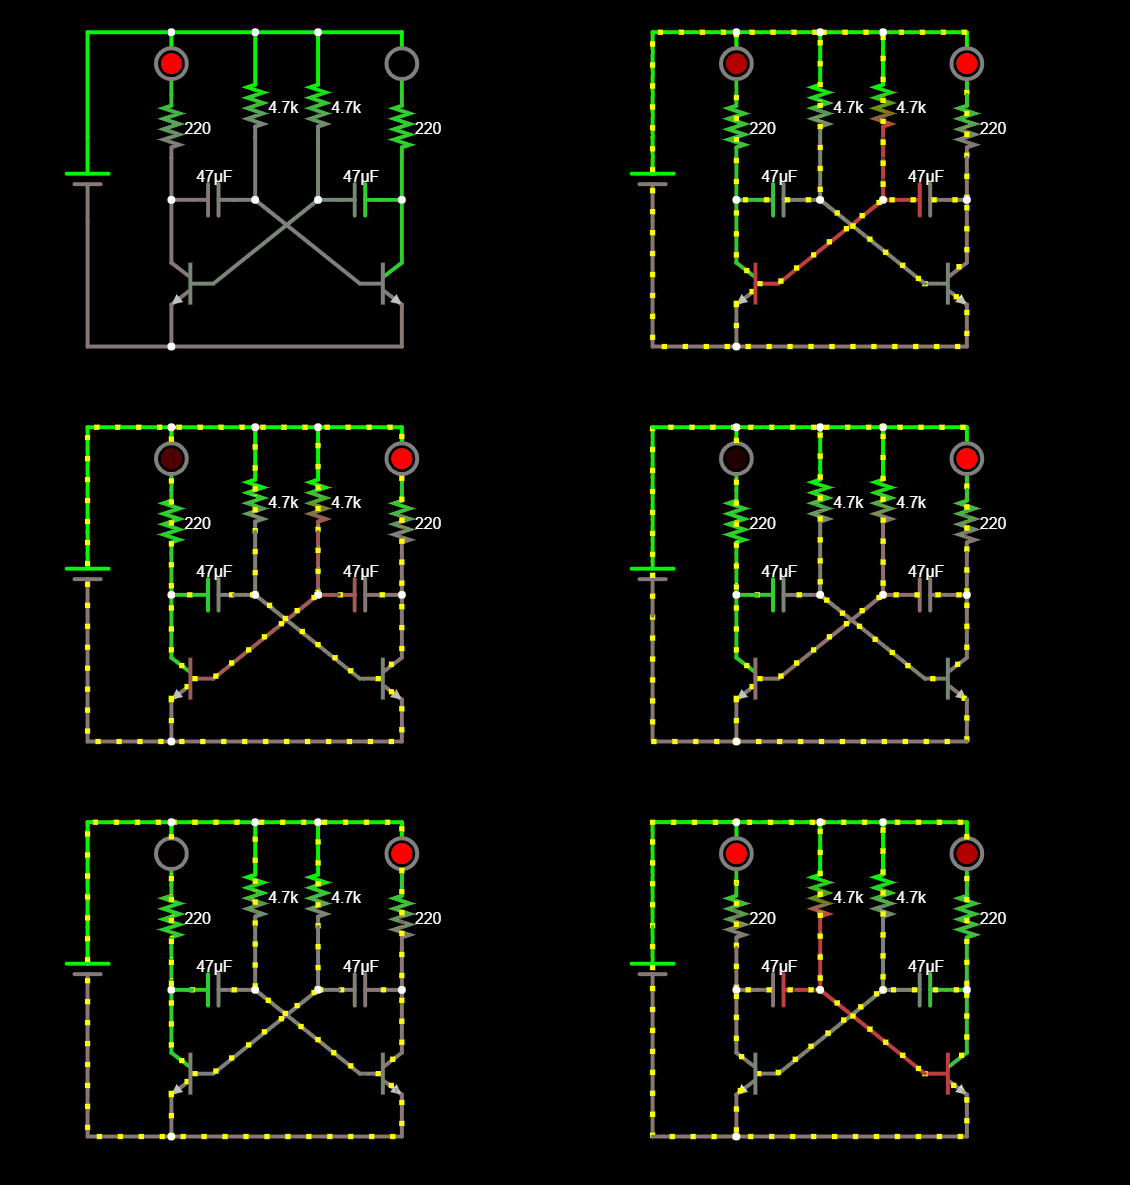
The Astable Multivibrator is another type of cross-coupled transistor switching circuit that doesn’t have any stable output states, meaning its output changes from digital one to zero and vice versa. This circuit consists of two switching transistors, a cross-coupled feedback network, and two time delay capacitors which creates oscillation without the need of any external triggering circuit to produce square signals.
Here’s in short what happens in this circuit: The Capacitors C5 and C6 charge and discharge alternately through the resistors, that turns transistors off and on (cutoff region and saturation region). And thus the square waveform is created which in turns creates a flickering effect in LEDs. This can be better understand by using the below illustrations:
One can change the flickering speed of LED by changing the value of RC by using the below given formula as:
The Frequency of oscillation= Frequency of blinking= f
f= 1/T= 1/(1.38RC)
Where, T= time period, R= R13= R14, C= C5= C6
Visit for more on astable multivibrator
Flickering LED circuit with Arduino
Components required:
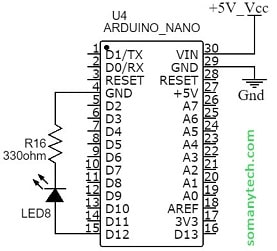
Resistors 1x 330Ω; Connecting wires; 1x LED; Arduino nano;
Circuit diagram:
In the diagram below we have used D12 as an output control pin.1
The LEDs have one long leg (say, anode or positive leg). GND should be connected to the shorter leg of the LED (the negative leg, called the cathode) with the resistor 330Ω in series. And provide a power supply of 5V or whatever is available to you.
After you have built the circuit, open the Arduino Software (IDE). Connect the Arduino board to your computer and enter the following code into the IDE and dump the code to it.
Code for Blinking LED circuit:
const int LED_OUTPUT_PIN = 15;
void setup()
{
// set Pin 3 to output
pinMode(LED_OUTPUT_PIN, OUTPUT);
}
void loop() {
digitalWrite(LED_OUTPUT_PIN, HIGH); // turn LED on (output 5V)
delay(1000); // wait one second
digitalWrite(LED_OUTPUT_PIN, LOW); // turn LED off (output 0V)
delay(1000); // wait another second
}
Or
void setup()
{
// set Pin 3 to output
pinMode(15, OUTPUT);
}
void loop() {
digitalWrite(LED_OUTPUT_PIN, HIGH); // turn LED on (output 5V)
delay(1000); // wait one second
digitalWrite(LED_OUTPUT_PIN, LOW); // turn LED off (output 0V)
delay(1000); // wait another second
}
Click here for more detail on flickering led circuit using Arduino nano.
Conclusion:
All of the above circuits are well tested for blinking LED circuits for their output as an LED indications in a blinking pattern. Try all these circuits as it requires minimal components and costs are too affordable. Due to their simple design and basic mechanics involved, it can be experimented by individuals of all skill levels.


